 EZVIZ no longer supports Internet Explorer 10 or earlier versions, and the site may not behave as expected. Please upgrade to a newer browser.
1. ติดตั้ง EZVIZ Studio บนพีซี Windows ของคุณ และตรวจสอบให้แน่ใจว่าอุปกรณ์ EZVIZ และพีซีของคุณอยู่ในวง LAN เดียวกัน
2. หลังจากการติดตั้ง คุณจะต้องเข้าสู่ระบบบัญชี EZVIZ ของคุณก่อน
3. จากนั้นไปที่แฟ้มของ Ezviz Studio บนพีซีของคุณและค้นหาโฟลเดอร์ชื่อ "config"
4. คัดลอกไฟล์ชื่อ "AppConfig.ini" ในโฟลเดอร์ "config" ไปยังเดสก์ท็อปของคุณ จากนั้นเปิด "AppConfig.ini" บนเดสก์ท็อปแล้วคุณจะเห็นคำสั่งต่อไปนี้
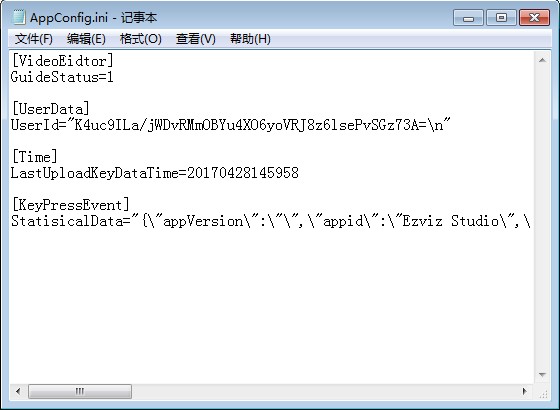
5. เพิ่มคำสั่งต่อไปนี้ใน "AppConfig.ini" และคลิก "บันทึก" ก่อนออก:
[LocalOperation]
Show=1
6. คัดลอกไฟล์ "AppConfig.ini" จากเดสก์ท็อปของคุณไปยังโฟลเดอร์ "config" และซ้อนทับไฟล์เก่า
7. รีเฟรชหน้าอุปกรณ์ใน Ezviz Studio หรือเปิด Studio อีกครั้ง จากนั้นคุณจะเห็นข้อความ “Advanced”
8. หากคุณต้องการซ่อนการตั้งค่า "“Advanced” โปรดเปลี่ยนคำสั่ง “Show=1” เป็น “Show=0” จากนั้นเปิดสตูดิโอ EZVIZ อีกครั้ง


